Making the Bowls
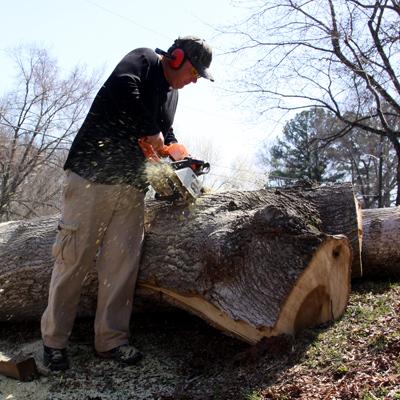
Thomas Haapapuro cutting a large poplar tree into manageable sized pieces to take back to the studio.
Harvesting the trees.
All of the bowls we make and sell come from trees which have fallen or are about to be removed due to disease or development. So we save these trees, and give them an opportunity to reveal their hidden, inside beauty. This not only saves a tree from the landfill and is environmentally sustainable and ecologically sensitive, it also provides a unique regionalism to the pieces as all of the trees come from around the neighborhood where we live and work.
The process starts when we receive a call or message that a tree is available. We load up chainsaws and winches, and head to the site to cut the tree into manageable pieces, load it on the truck, and take it back to our studio.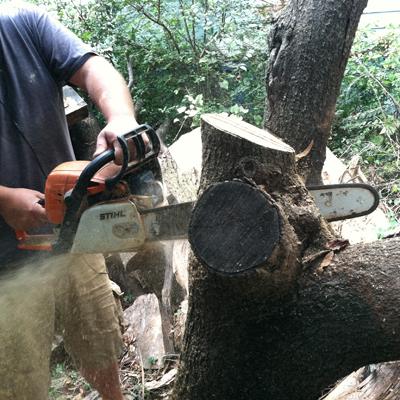
The tree is being cut down the center to create slabs which the bowl shape will be made from.
Cutting the tree into slabs.
With the tree back at the studio, it is prepared when it is still green (the wood has not cured). This normally begins with a long slice down the center of the tree. This is where wood is most likely to split in the final piece, so we head this off by cutting it there to begin with. This also allows us to create very long bowls with a unique grain pattern. Most wood turners cut the trees across the grain, instead of with the grain as we do. We prefer the opportunities and aesthetics of this approach, and believe it gives our work a unique look.
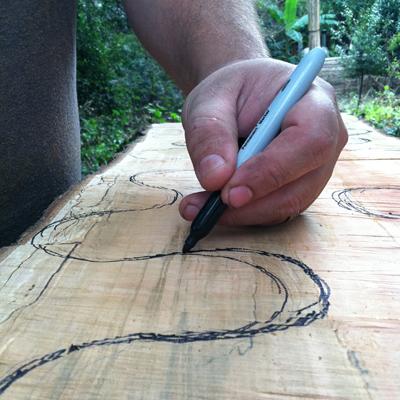
A pattern being drawn on the face of the log slab.
Laying out the bowl shape
With a pencil, then a sharpie, a freehand pattern is drawn on the surface of the slab. The pattern will work around weak places in the log, swooping in to take advantage of an interesting grain in the wood, swooping out to avoid a knot in the tree. Since no two logs are alike, neither are two patterns ever the same.
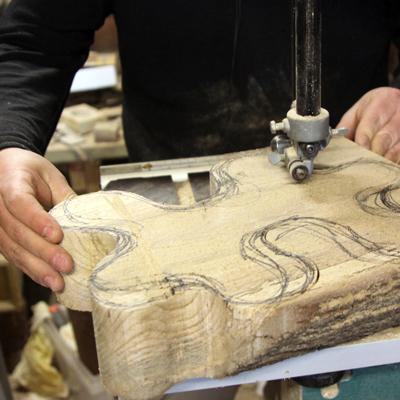
A smaller bowl blank can be cut using the band saw.
Cutting the bowl shape
The pattern, which will be the outside edge of the bowl, is then cut. On smaller bowls, this can be done with the band saw. On larger bowls, this step is very carefully done using the chain saw.
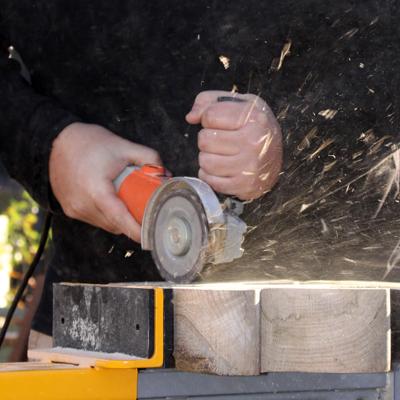
The chainsaw power carver is used to rough shape the bowl.
Rough carving the bowl
With the bowl blank complete, the real work begins. To give the initial shape to the bowl, a powerful carver is used. This carver is essentially a small chain saw blade attached to an angle grinder. This tool is very good at removing material and giving a rough shape to the bowl.
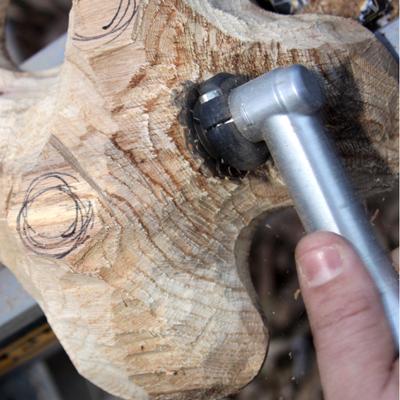
A much smaller chain saw carver is used to finesse the bowls shape and refine the design.
Fine carving the bowl.
When the rough shape of the bowl has been created, a much smaller chain saw carver is used to refine the details. At this stage, the bowl begins to take shape, and is slowly refined to make the bowl thin and light. The gentle undulations of the bowl are developed carefully at this stage.
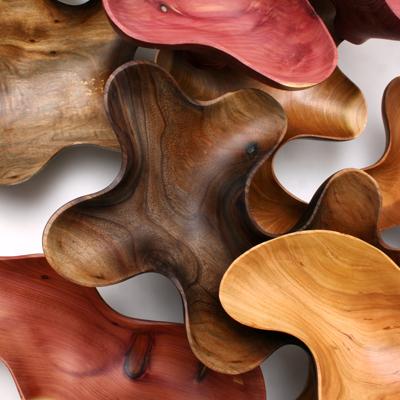
The bowls are sanded to a shine, then finished with an all natural wax mixture to reveal the tree's natural color and beauty.
Final steps.
After the shape has been refined and finessed, the bowl is sanded very carefully. Sanding starts with very rough sandpaper, and graduates to finer and finer grits until the wood gleams. Then an all natural finish wax, made from beeswax, linseed oil, and bear berry fruits, is applied to the bowl. This wax is burnished into the wood, creating a durable, all natural shine that protects the wood without changing the natural beautiful color of the tree. At long last, the fallen tree's inner beauty can be witnessed and cherished for generations to come.